Toy Design 7th Grade
Unit Mission: Design a toy that will indicate to others something unique about your personality.
Key Concepts: Students will know
· How to become creative, expressive, and productive
· About toys: colors, function, audience, safety, materials, and design principles.
· Planning is useful for successful design.
· A variety of sewing methods can be used to create objects or clothing.
· Technology can be used to investigate design and construction.
Skills Learned: Students will be able to
· Design with style, purpose, and meaning.
· Sew using basic techniques.
· Use Photoshop, or Microsoft Publisher, etc. to design packaging.
· Share and discuss strengths and weaknesses in each other’s work.
· Write a statement about their toy that recognizes and describes their personal attributes and how they correlate with the toy’s design and attributes.
Artists: Ellen Lupton, Jen Bennett Gubzica, Jim Lasher, Ayumi Yasuda, Ryan Cecil Smith,Daniel Krall
Action Figure - 7 Visual Graphic Art Magnet
Engineering Prototype
Objectives Sequence:
Objectives Sequence:
- - Develop 2 lists of Toys, One for toys you used as a child and another for toys you use today.
- - Complete a graphic organizer to brainstorm how toys are developed and used.
- - Draw a conceptual rendering of your toy, through drawings that plan the front, back, and side views.
- - Use a graphic organizers to brainstorm personal characteristics you want to symbolize in your action figure’s features. Then write a description of your action figure.
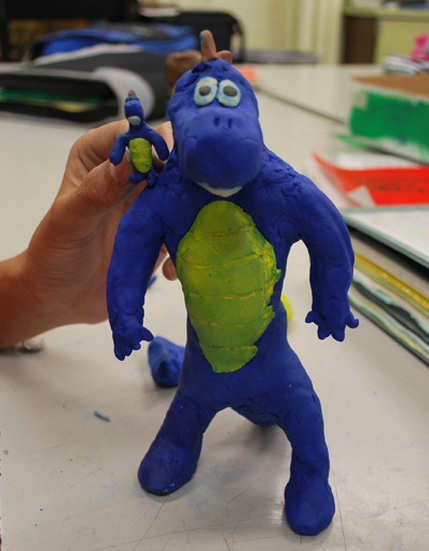
- - Use wire to build an armature to begin constructing a prototype for your action figure.
- - Add clay to your armature by laying over flat sheets of colored pieces.
- - Complete your action figure by inserting facial features & finishing details.
- - Conduct a peer review with a partner to assess toy design & structure so far.
- - Complete finishing touches on your action figure.
- - Practice package design structure by using the template to make a box.
- - Collage a Graphic Organizer to examine color, lettering, and images in Package Design.
- - Look at the examples of packages on the board. Take notes on and be ready to share: What compositional elements do you see? What stands out the most? The least? Which are too busy? Or too simple?
- - Complete your Digital Graphic Organizer today to prepare for designing your Toy’s Package Design. Use tag board to begin construction of the box structure of your package.
- - Complete and measure your package box to create the right size Photoshop document. Practice using Photoshop to learn how to design your Toy Package.
Sample Criteria
Action Toys
Artist name: _________________________________ Art Section: ________
Assess the artwork according to the scale:
4 – consistently 3 – usually
2 – sometimes 1 – rarely
I have built a sturdy wire armature that is not too wobbly.
I have used the right amount of plastic bag under the clay for support.
I have used clay to cover all wire and plastic.
I have added details to make my action toy look like my plan drawing.
I tried my best to create an action toy that is smooth, well blended, and carefully crafted.
I designed a toy that shows something unique about me and that unique thing is:
……………………………………………………..
……………………………………………………..
……………………………………………………..
Total points
/24
Concept Plan Drawing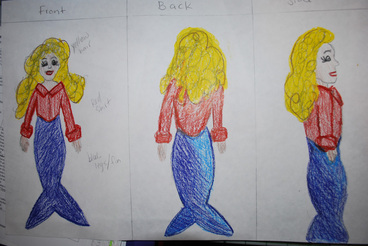
 |
 Package Design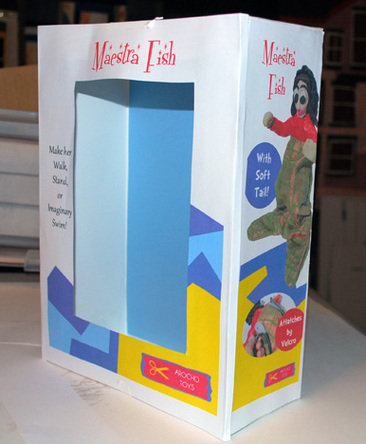
|
Photoshop Design Criteria
I have included letting that is unified throughout the design.
I have included a slogan for my toy.
I have included the Toy Name in the design.
I have used unity in my design through font, color, & shapes.
I have appropriately used contrast & emphasis by differentiating the size of text details: Toy Name, Slogans, and my name as the Brand name.
I have included an isolated image of my toy into my design.
Total Points: / 30
Plush Toy - 7th Art Modified
Unit Mission: Design a toy that will indicate to others something unique about your personality.
Engineering Prototype
Modified Objectives Sequence:
Engineering Prototype
Modified Objectives Sequence:
- - Develop 2 lists of Toys, One for toys you used as a child and another for toys you use today.
- - Complete a graphic organizer to brainstorm how toys are developed and used.
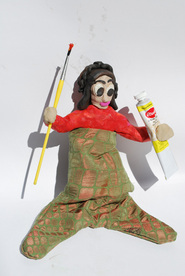
- - Follow the guidelines to make a pillow; this will help you to learn basic sewing skills you’ll use later in your own toy design.
- - Learn how to make different kinds of stitches.
- - Learn how to make an end stitch to your pillow in order to add a second piece of thread.
- - Complete your practice pillow by adding stuffing then close it using either a Blind or Whip Stitch.
- - Brainstorm personal characteristics to include in your toy’s design.
- - Draw a conceptual rendering of your toy, through drawings that plans the front view.
- - Trace your plan drawing to create a sewing pattern.
- - Complete your sewing pattern in order to begin sewing your designed toy, that indicates to others something unique about your personality.
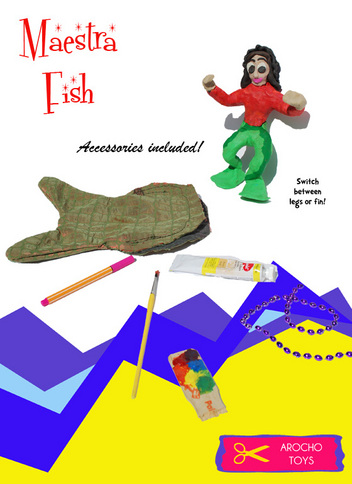
Plush Toy Tag Design
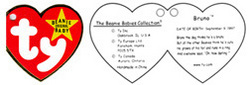
Objective: Design a tag for your Plush Toy that describes the parts you want to emphasize about yourself.
Rationale: You will need a tag to label your toy so that other people will know: Who made it and how the toy is representing something about you.
Be sure to include:
1. Write a short full sentence description for your toy that describes which parts of your toy are symbols or characteristics of YOU. What about the toy makes it yours? How will people know something about you because of the type of toy you made?
2. Create a logo that goes with your tag. A logo is a symbol, a picture that represents something - so that means your logo should emphasize something about you through an image.
3. On the front use a part of your name or initials as the Brand Name. Emphasize the brand name by using large and bold lettering. On the back write your full first & last name, and the year it was made.
4. Decide on a name for your toy, and then include this somewhere on your tag.
Sample Description:
“Toy Name” means, because…
It symbolizes that I am…
The toy is like me in that….
